I am going to start with a little rant about Visual Studio default Installer, you know, the one you can make for yout XNA games inside VS. Ugly and not very handy, sure it installs every dependency but doesn’t leave many options like….hum…I don’t know choosing the location where you want to install?
Moving along…I discovered this little cool installer called InnoSetup, and best of all it’s free.
InnoSetup has different ways of you building a proper installer but I am going to cover the script way, much more control.
I found a little startup script from Caliban Darlock for XNA 2 I think and I modified it for XNA 3.1
Start by downloading vcredist_x86.exe, DotNetFX35Setup.exe and xnafx31_redist.msi and place them in a folder, I placed mine on D:\Game Development Tools\
Then onto the script
; Script generated by the Inno Setup Script Wizard.
; (Then extensively modified by Caliban Darklock.)
; (And yet again modified by David Amador) Should work property with XNA 3.1
; SEE THE DOCUMENTATION FOR DETAILS ON CREATING INNO SETUP SCRIPT FILES!
; Enter the name of your game here
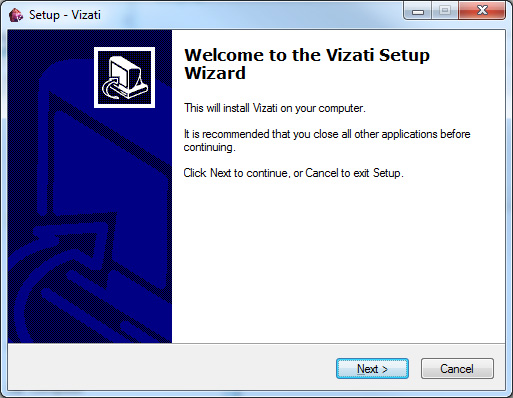
#define MyAppName "Vizati"
; Enter the name of your game and a version number here
#define MyAppVerName "Vizati"
; Enter the name of your company, or just your name
#define MyCompany "Different Pixel"
; Enter the URL of your website
#define MyAppURL "https://dj_link.itch.io/vizati/"
; Enter the path to your game project - check Visual Studio properties for the path
#define MyAppLocation "D:\Projects\Vizati\Vizati"
; Enter the name of your game executable
#define MyAppExeName "Vizati.exe"
; Enter the location where XNA Game Studio is installed
#define MyGameStudioLocation "C:\Program Files (x86)\Microsoft XNA\XNA Game Studio\v3.1"
; Enter the name for the correct version of the XNA Framework MSI
#define XNARedist "xnafx31_redist.msi"
; Enter the location where you have placed the VC and .NET redistributables
#define MyRedistLocation "D:\Game Development Tools"
; search microsoft.com for "visual c++ sp1 redistributable" to get the VC redist
; enter the name of the executable file here
#define VCRedist "vcredist_x86.exe"
; Download latest .NET from http://www.microsoft.com/net/ (download button on menu)
; enter the name of the executable file here
#define DotNetSetup "DotNetFX35Setup.exe"
; Once you've filled in all the variables above and downloaded your redist packages,
; everything under this point should JUST WORK for most XNA projects.
[Setup]
AppName={#MyAppName}
AppVerName={#MyAppVerName}
AppPublisher={#MyCompany}
AppPublisherURL={#MyAppURL}
AppSupportURL={#MyAppURL}
AppUpdatesURL={#MyAppURL}
DefaultDirName={pf}\{#MyAppName}
DefaultGroupName={#MyAppName}
OutputBaseFilename={#MyAppName}Setup
Compression=lzma
SolidCompression=yes
SetupIconFile = "D:\Projects\Vizati\Vizati\vizati.ico"
UninstallIconFile = "D:\Projects\Vizati\Vizati\vizati.ico"
[Languages]
Name: english; MessagesFile: compiler:Default.isl
[Tasks]
Name: desktopicon; Description: {cm:CreateDesktopIcon}; GroupDescription: {cm:AdditionalIcons}; Flags: unchecked
[Files]
; DirectX and XNA Framework redistributables
Source: {#MyGameStudioLocation}\Redist\DX Redist\*; DestDir: {tmp}
Source: {#MyGameStudioLocation}\Redist\XNA FX Redist\{#XNARedist}; DestDir: {tmp}
; .NET and VC redistributables - VerifyDotNet35 MUST run BEFORE VerifyDotNet35sp1!
Source: {#MyRedistLocation}\{#DotNetSetup}; DestDir: {tmp}; AfterInstall: VerifyDotNet35
Source: {#MyRedistLocation}\{#VCRedist}; DestDir: {tmp}; AfterInstall: VerifyDotNet35sp1
; The game itself
Source: {#MyAppLocation}\bin\x86\Release\{#MyAppExeName}; DestDir: {app}; Flags: ignoreversion
Source: {#MyAppLocation}\bin\x86\Release\*; DestDir: {app}; Flags: ignoreversion recursesubdirs createallsubdirs
[Icons]
Name: {group}\{#MyAppName}; Filename: {app}\{#MyAppExeName}
Name: {group}\{cm:UninstallProgram,{#MyAppName}}; Filename: {uninstallexe}
Name: {commondesktop}\{#MyAppName}; Filename: {app}\{#MyAppExeName}; Tasks: desktopicon
[Run]
Filename: {tmp}\{#DotNetSetup}; Flags: skipifdoesntexist; Parameters: "/q /noreboot"
Filename: {tmp}\{#VCRedist}; Flags: skipifdoesntexist; Parameters: "/q"
Filename: {tmp}\dxsetup.exe; Parameters: /silent
Filename: msiexec.exe; Parameters: "/quiet /i ""{tmp}\{#XNARedist}"""
Filename: {app}\{#MyAppExeName}; Description: {cm:LaunchProgram,{#MyAppName}}; Flags: nowait postinstall skipifsilent
; The code section doesn't like comments for some reason.
; VerifyDotNet35 removes the .NET setup if you already have .NET 3.5 installed.
; VerifyDotNet35sp1 removes the VC redist if you already have .NET 3.5 SP1, -or-
; if you don't have .NET 3.0 at all (it will be installed along with .NET 3.5).
; Using the skipifdoesntexist flag allows the setup to ignore the missing files.
[Code]
var
hasDotNet3 :Boolean;
hasDotNet3sp :Boolean;
whichDotNet3sp :Cardinal;
procedure VerifyDotNet35();
begin
hasDotNet3 := RegKeyExists(HKEY_LOCAL_MACHINE, 'SOFTWARE\Microsoft\NET Framework Setup\NDP\v3.5');
if hasDotNet3 then
DeleteFile(ExpandConstant('{tmp}\{#DotNetSetup}'));
end;
procedure VerifyDotNet35sp1();
begin
hasDotNet3sp := RegQueryDWordValue(HKEY_LOCAL_MACHINE, 'SOFTWARE\Microsoft\NET Framework Setup\NDP\v3.5', 'SP', whichDotNet3sp);
if (hasDotNet3sp and (whichDotNet3sp > 0)) or not hasDotNet3 then
DeleteFile(ExpandConstant('{tmp}\{#VCRedist}'));
end;
So you can basically copy paste this and save it as a .iss file. Should open on double click with Inno Setup Compiler once you install it.
It’s pretty straight forward and you can modify it with your paths and specific need.
Things to care about:
#define MyAppLocation – This is where your Game Project is, typically one folder below the solution
#define MyGameStudioLocation Folder to XNA Game Studio 3.1 Installation
#define MyRedistLocation Folder where vcredist_x86.exe and xnafx31_redist.msi and DotNetFX35Setup.exe should be
The installer will also fetch every file inside you Release Folder. So you might wanna delete those .pdb files before doing it.
Hit Compile and there you go.
If everything goes alright the installer should test the registry for XNA and .NET 3.5 and install it if needed. I used Virtual PC with a clean Windows XP installation to test it and it worked. XNA got installed =)